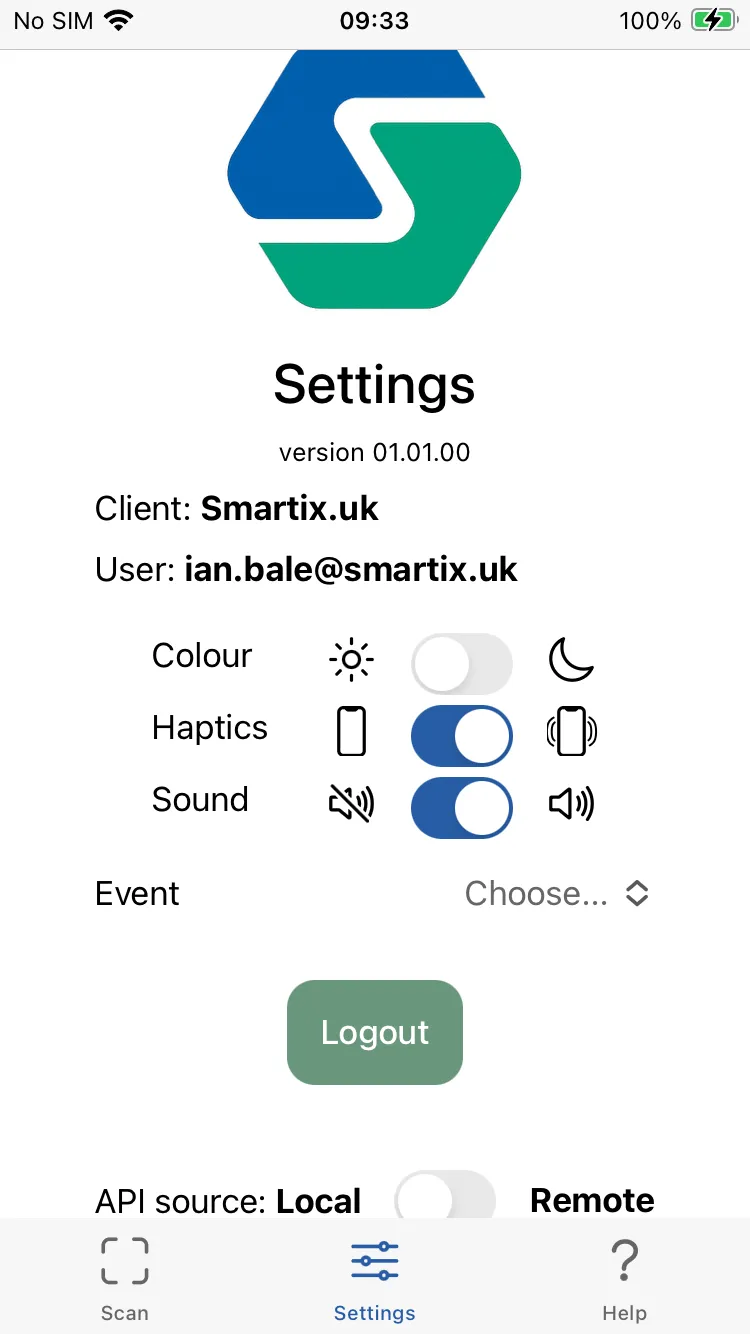
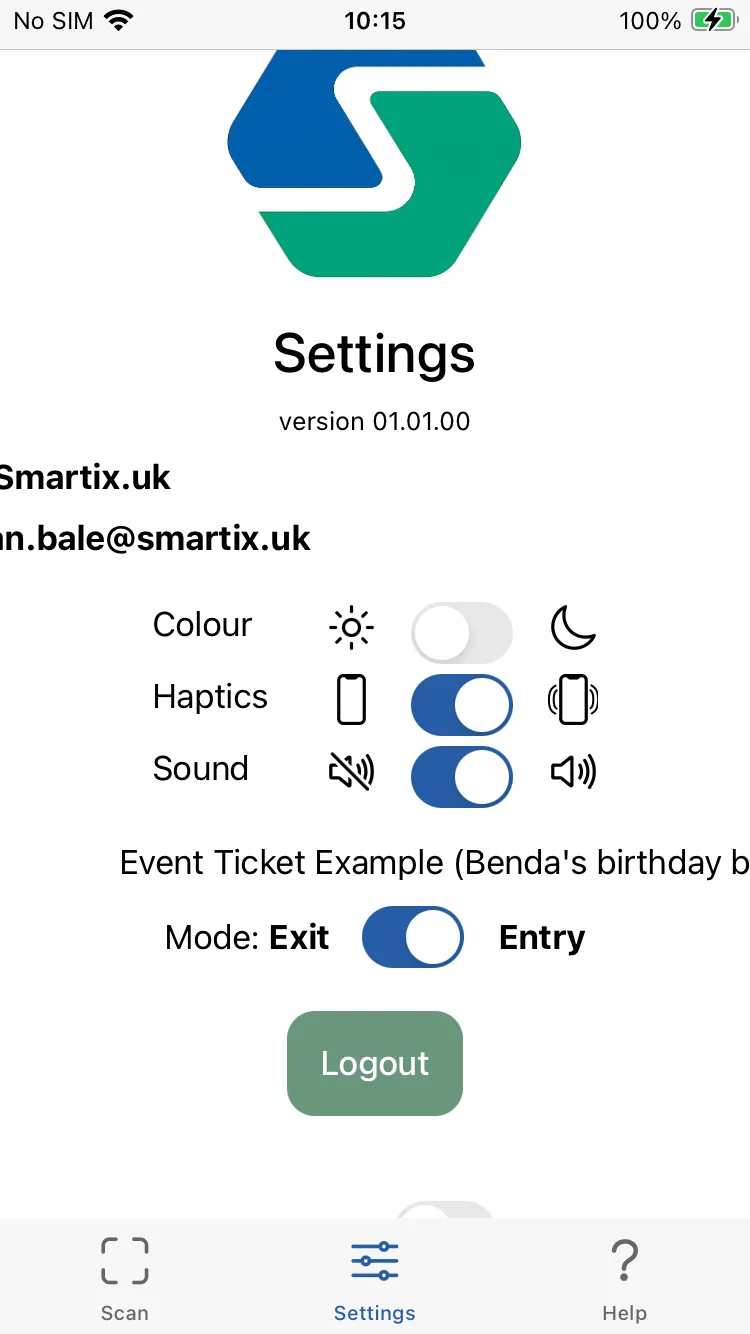
Skip to content

Event Tickets

Event Tickets

Settings

For an event, we need to ensure we are not ony scanning passes issued by yourselves, but also for the correct event!

So, you need to start by selecting the current event from the Settings Page.

Click the choose button and select your event from the drop down list.

Scanning

Scanning

Entry Permitted

If you scan a valid, unused ticket then you’ll see confirm entry page with its large, easy to see green circle and white check mark.

You may also hear a confirm tone and feel a confirm vibration if enabled in your settings.

After a short pause (configurable), the scan page will be shown ready to scan the next ticket enablign you to scan multiple tickets reliably in quick sucession.

If you have configured unrestricted re-entry for your event, then will see the confirm page if you scan a used ticket - IF an exit was also recorded (see below)

Entry Denied

The denied entry page shows a large red circle and white cross mark and is accompanied by a negative tone and negative vibration (if enabled in your settings) clearly indicating that the ticket is not valiud for entry.

A message on the screen gives the reason for rejection. This may be that the ticket has already been used (and re-entry is not permitted or an exit scan weas not recorded), or the ticket has been disabled.

When entry is denied, the App does not automatically return to the scan screen. This gives you time to review the message, scan history etc. When you are ready, tap the close button at the top left.

Scanning

Scanning

Scan History

Swipe left to get to the scan history screen. Depending on whether or not you have re-entry enabled you will need to swipe once or twice.

This page shows a list of scans recorded for this ticket.

You can alos review ticket scans in Studio.

Manage Ticket

Swipe left again to get to the manage ticket screen.

If you have need to disabled / re-enable a ticket then you can do so here. Add a message so the reason is recorded.

Scanning

Scanning

Record Exit

When creating your event template you can choose whether or not to premit re-entry. This can be restricted or unrestricted. In both cases, tickets must be scanned on exit. If restricted then a reason why re-entry is being permitted must be recorded.

Whilst it is typical that events do not permit re-entry, this feature can make it easy to manage exceptional circumstances where is might be. For example, someone attending a family oriented event may report that they have left their baby food in the car and need to collect it. Staff decided that thsi is reasonable and record this. When re-entry is attempted - where their ticket may well be being scanned by someone else - they will see this message and can challenge the ticket holder to show that they have the baby food.

Reentry

If you have unrestricted re-entry enabled, then provided an exit scan has been recorded, then the normal Entry Permitted screen is shown, so re-entry is fast and efficient.

If re-entry is restricted then you see this screen which shows the reason for leaving the event. Your staff can then challenge the ticket holder to show that the agreed re-entry conditions have been met and then either permit or deny the entry.

Scanning

Scanning

Exit Mode

If you have unrestricted re-entry enabled then your setting page will show an additonal option : scan mode. By default, this is set to entry and scan tickets for entry into your event.

The other option is exit. When you select this mode, you can more rapidly scan tickets of people exiting your event.